Category: mobile
-
Immich and External Libraries
Reading Time: 3 minutesOver two or three years I have been playing with Immich. In that time I have exported my photos from two or three phones multiple times. The reason for me importing photos multiple times is that every so often I update immich and something breaks. It is at this point that I…
-
AppleCare+ Justified for Once
Reading Time: 3 minutesPeople know that I love to hate the Apple Watch. I have loved to hate it since I had an Apple Watch Series 3 where the screen cracked while indoor climbing. For years I had climbed with Suunto without any issues. I replaced the Apple Watch Series 3 with a Series 4…
-
Expired Tailscale Device Keys
Reading Time: < 1 minuteYesterday I found myself accessing Audiobookshelf on one of my Pi devices in the morning and it timed out in the morning. As I am travelling this situation is not ideal as I had to find a way to recover access. I checked the tailscale device list and could see that…
-
Nextcloud Via Infomaniak Hosting
Reading Time: 2 minutesFor a few days I was playing with Day One, the note taking app, after years without touching it and I was playing with the idea of paying for the app. The cost is 38 CHF per year. It used to be cheaper. I think it was around 23-28 CHF rather than…
-
The Long Drive
Reading Time: 2 minutesIt’s funny. It is a drive that I have done plenty of times. Tomorrow I will do the usual twelve hour drive from Switzerland to around Alicante, and I will do so with minimal stops. In essence the drive is easy. I take the motorway from Nyon all the way to Ondara,…
-
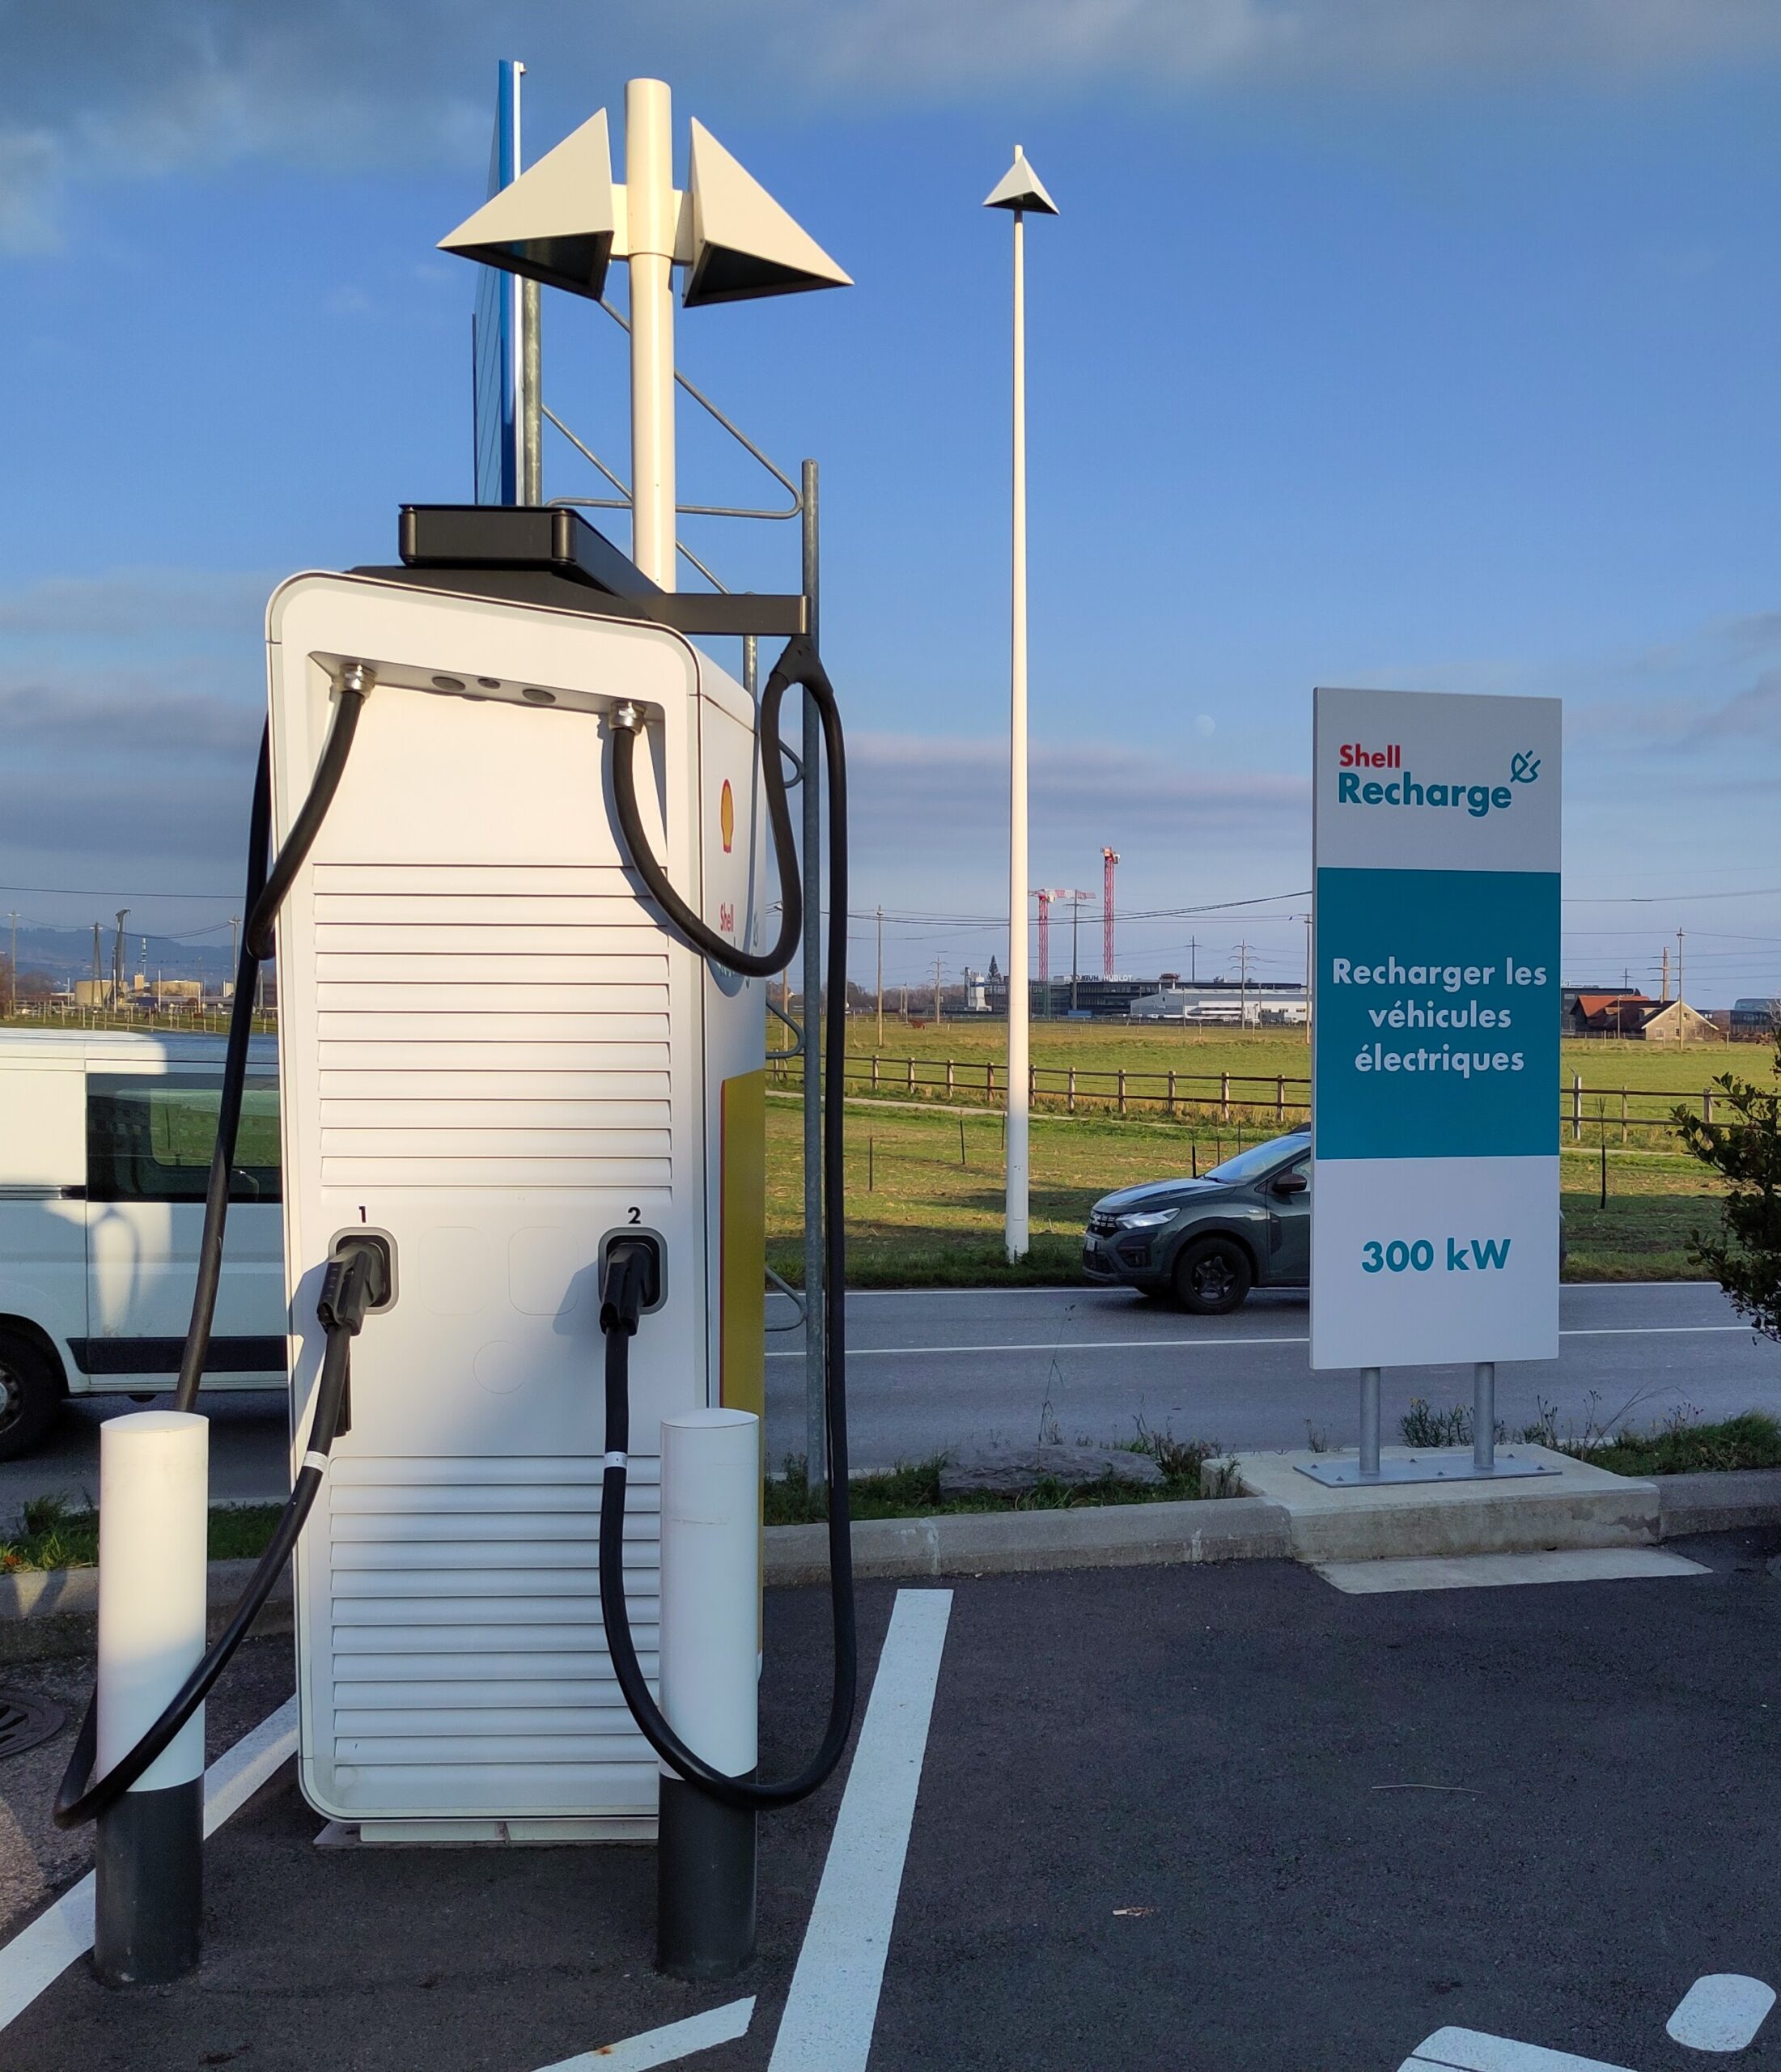
EV Charging around Signy and Nyon
—
by
Reading Time: 2 minutesYesterday morning I plugged the car in to charge at Signy Centre while shopping and for the price of a coffee I charged the car by ten percent. I then went to the lakeside of Nyon to test the Service Industriel de Nyon (SIN) chargers and failed. They were out of service…
-

Goodreads Et Al
Reading Time: 2 minutesRecently people wanted to move from Goodreads to open alternatives to move away from the grasp of Amazon. I wanted to do the same so I moved to two or three apps and used them for a while. I stopped using them for one simple reason. They don’t have an extensive library…
-
The Evolution of In Car Navigation
Reading Time: 2 minutesWhen I was a child we had paper maps. These maps had to be studied and read to make navigating simpler. You had to know that you would drive from A to B to C to D and so forth. In the age of Google Maps, before phone navigation we had to…
-
The Growing Desire to Self-Host
Reading Time: < 1 minuteAs WordPress grows and as my comfort with Hugo increases I question whether to move my blog from Infomaniak to being self-hosted on a Pi. I know that the Pi is not powerful but my site doesn’t get much traffic so I don’t think that it will be overwhelmed with traffic.…
-
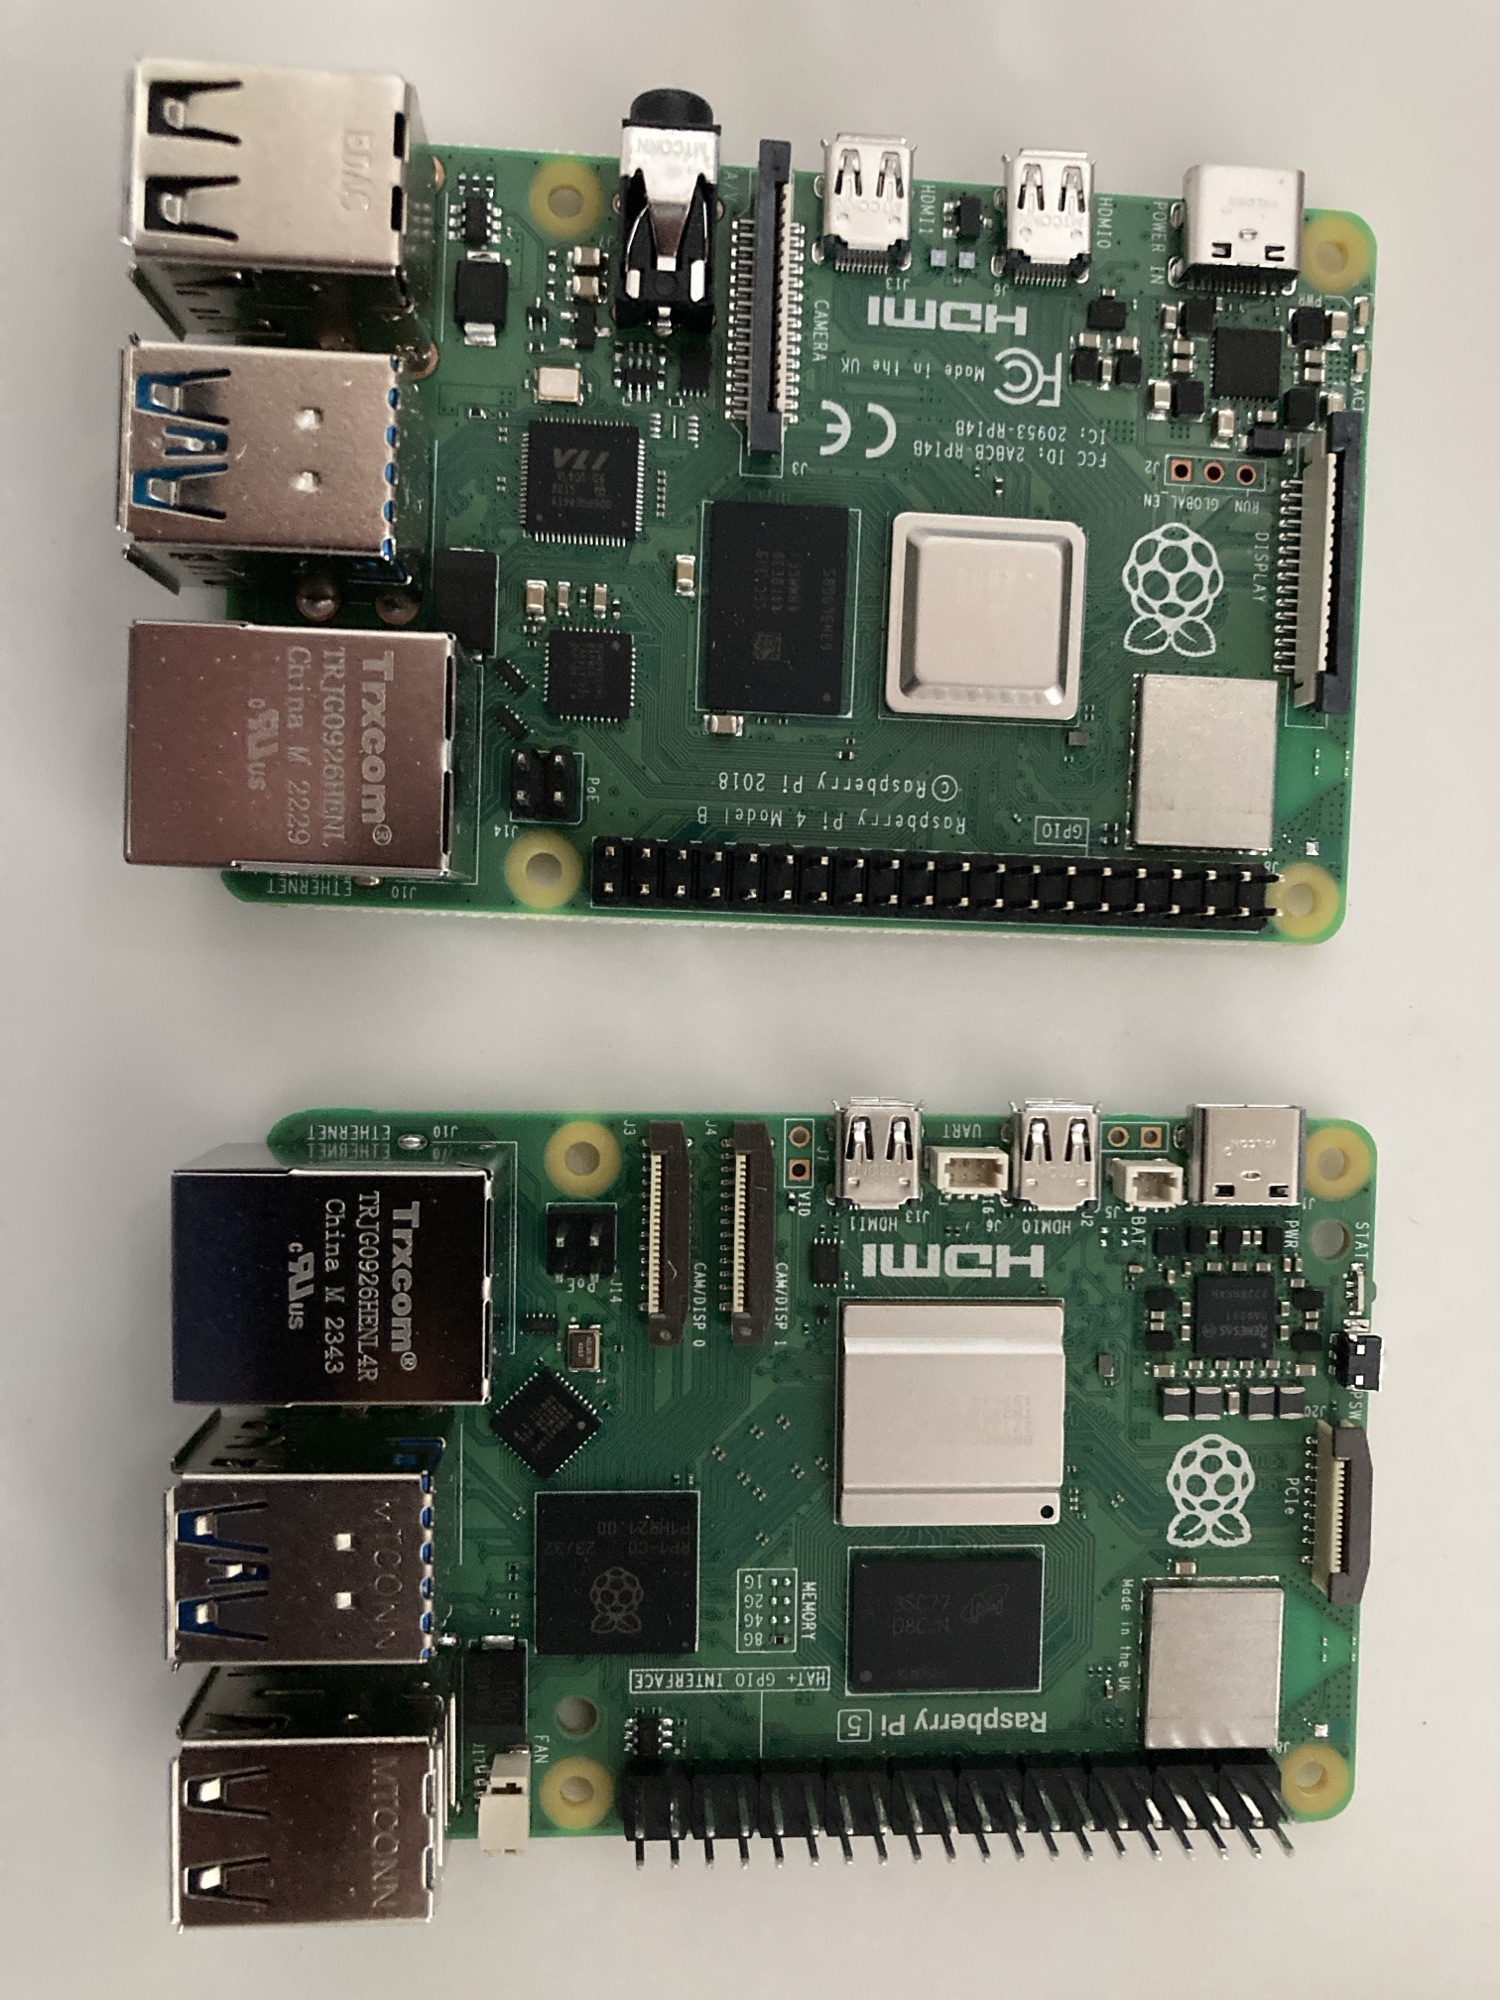
Immich and an M.2 NVMe Drive on a Pi
Reading Time: 2 minutesImmich is an easy to install and use app that works well with the Pi5. By default you will have it run on the SD card but yesterday I finally found an NVMe drive at a reasonable price so I swapped the AI kit for a 521 NVMe drive.It was detected with…