Table of Contents
Recently I migrated my photos from Instagram to a WordPress blog. The process took some trial and error. The first step is to understand how to read JSON files and format them in a way that WordPress can use. The next step is to import that data into WordPress.
To request your data follow this link, request the data and wait for an e-mail telling you that the files are ready to download. When the files are ready to download download them and unzip the files.
Convert from JSON to CSV
You will find photo directories listed by year and month. You will also get a few JSON files but the ones you want are the media.json files. With a tool like the Konbert app you can convert the files from JSON to CSV files. When the CSV file or files are ready open them in Google Sheets or other spreadsheet software and look at the columns.
The fields you will find are
- Caption
- Taken At
- Location
- Path
- Stories
- Videos
- Photos
Although not essential you can add fields like author. If you see “stories” and “videos” remove these columns. The CSV importer plugin I used cannot import videos and stories automatically.
When this is done you should have a CSV file that has caption, taken at, location, and path. Keep the photo file structure as it is.
Installing WordPress Locally
The simplest WordPress installation I found is Local. Within minutes you can have a wordpress blog setup and running on your local machine. The reason you want a local install is that JSON to CSV conversions can be messy so if you make a mistake it is easy to reset and start again.
It took several attempts before I managed to import all the images and get them to display properly. If I had imported those files to my production WordPress Blog I would have spent hours deleting thousands of posts more than once.
Folder Structure
When you import your images to WordPress with the CSV importer tool you have the option of leaving them where they are or of importing them into the uploads/year/month folder structure. Be warned that if you let the importer tool import the images itself it will import all of the images and generate thumbnails. If you have 3900 images you will end up with 12,000 images in a single folder as thumbnails are generated.
I would recommend:
- creating a folder for every year that you were on Instagram
- renaming every Instagram folder from /yearmonth/ to month, for example from 202006 to /06/ in the 2020 folder.
- placing each month in the appropriate year/month folder in uploads.
Preparing the CSV file.
For the next step, I would recommend saving a copy of the document as it is so that you can go back to it if you make a mistake.
If you have changed all of the yearmonth folders to a year/month/ folder structure then you can use find and replace to update the folder names. You can find and replace 202006 with 2020/06 and work recursively. This will take more time, but be tidier. The CSV importer tool does not keep imports tidy. If I had known this ahead of time I would have taken this additional step.
In the CSV file the path is relative. To be tidy I put the photo folders in /wp-content/uploads/photos/ and had to update the CSV document to reflect that. Although you can find and replace in Google Sheets I used Visual Studio code for the next step.
Originally the path will be something like photos/202006/filename.jpg. but as the images are in wp-content/uploads/photos WordPress will look in the wrong place. With Find and Replace I selected “/photos/” and replaced it with “http://localhost:10003/wp-content/uploads/photos/”. At this point, the CSV files were ready to be imported.
Import CSV to WordPress
Although I tried a few tools the one I settled on is WP Ultimate CSV Importer.

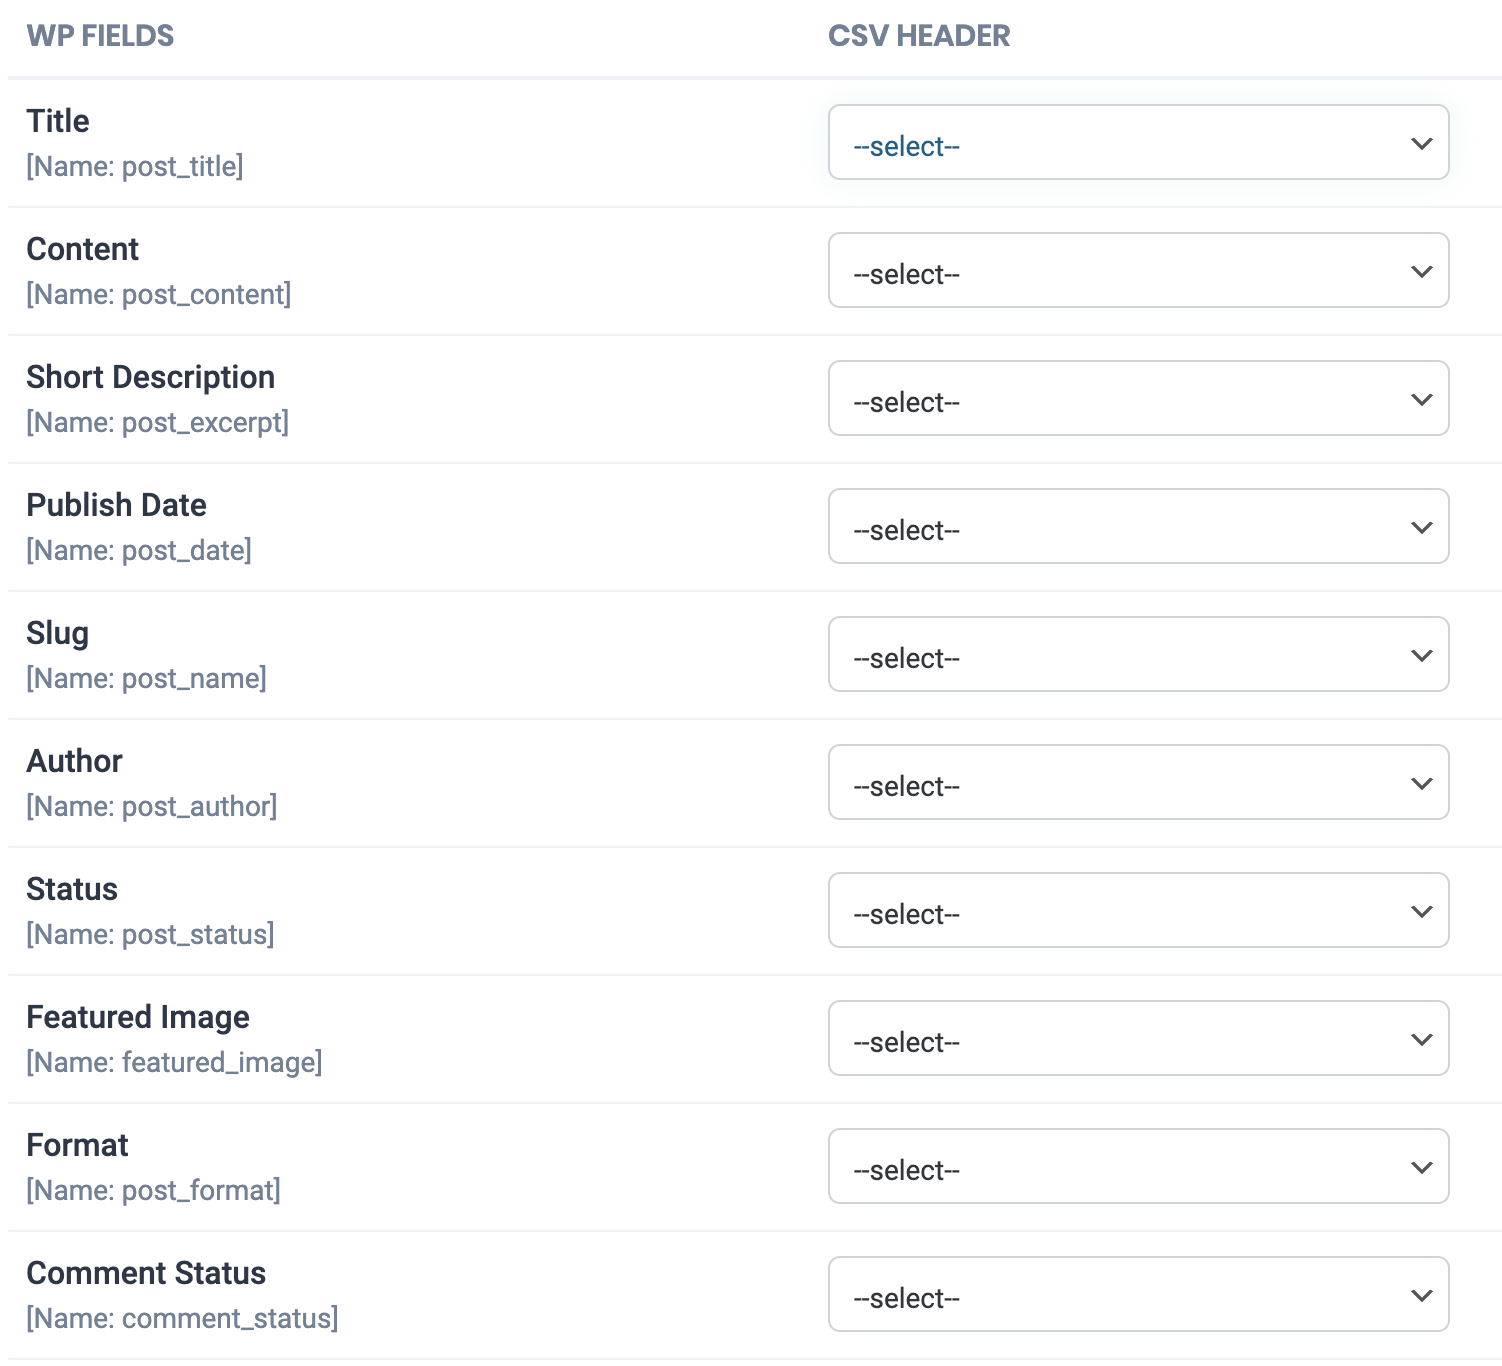
If the CSV file is prepared correctly you should see Caption, Taken at, Location and Path. When I imported I mapped it so that so that Title and Content and slug would be the caption and for slug to be the caption. I then mapped Taken On to Publish date and featured image to the image path.

If you have kept the image folders as they were when you unzipped the Instagram download then select “Use media images if already available” and “download post content external images to media.” The images will be copied from the photos folder into the correct folder for WordPress to use.
If you have already organised your images by year and month in the uploads folder then you do not need to check “download external images to your media as they are already there.
The Final Step
The Final Step is to find a theme that reflects how you. want your images to be displayed and share the new location of your photo library to your various social media profiles and networks.
As a final step if you find that an image does not load for single posts you can add this line of code after the PHP tag.
if ( has_post_thumbnail() ) { // check if the post has a Post Thumbnail assigned to it.
the_post_thumbnail( 'full' );
}
This is a lot faster than going through 3900 posts and adding an image to each individual post.
Conclusion
If everything works as expected you can now export a CSV file of your test blog and upload it and the appropriate files to your online photo blog.
Leave a Reply